
Here's a look at how to get started.
Pre-trip Planning
Winter outings offer different challenges than summer camping. You must be prepared for more severe weather and shorter daylight hours by having extra gear and additional skills. Before you leave home, have a plan.
- Don't go alone. Share the trip with a few friends who have expertise in different winter skills (snow shelters, route finding, snow travel, etc.).
- Study maps and research the area. How long will it take to get there and set up camp? If something goes wrong, what emergency services (i.e., medical, search & rescue) are closest?
- Talk to people who have been there and can give you pointers.
- Check the weather forecast. Are conditions favorable? The NOAA-NWS Web site offers detailed backcountry forecasts.
- Check the local road and trail conditions.
- Recognize and avoid avalanche areas. Check the local avalanche forecast and don't go if avalanche danger is high. Keep in mind that avalanche forecasts may be general and not accurate for specific areas. If you are on or near any slope greater than 20°, your group should have formal avalanche training.
- Leave a trip plan. Let others know where you'll be, when you'll be there, when you'll return, vehicle information and names and contact number for participants in your group.
- Make sure everyone in the group has the same plans, expectations, turnaround times and goals.
- Don't forget to pack something important.
- Carry some cash for unexpected fees or emergencies.
- Be prepared for the unexpected. Always have extra food and clothing just in case the weather changes, you get lost or your trip makes any unexpected detours.
Cold-weather Clothing

The simple rule of winter camping is to stay dry and warm. Choose clothing layers that wick moisture, dry quickly, insulate and are waterproof and breathable. By adjusting these layers, you can regulate the amount of warmth you need. The 3 basic layers:
The base layer is basically your underwear—the layer next to your skin. Synthetic and merino wool fabrics work best (avoid cotton). They wick perspiration away from your skin to outer layers so it can evaporate. They dry quickly so you spend minimal time in wet clothing. When snow camping, it's common to wear 2 base layers: a lightweight or midweight layer, then a thicker heavyweight layer.
The middle layer is your insulating layer. It is primarily designed to help you retain body heat. For snow camping, consider expedition-weight fleece or microfleece shirts, pants and jacket and/or a goose down jacket.
The outer layer, or shell, is your waterproof/windproof/breathable layer. Laminates such as Gore-Tex, eVent or REI Elements offer premium protection. Less expensive alternatives use polyurethane-coated fabrics that are equally waterproof but somewhat less breathable. Look for core vents and underarm vents that expel excess heat and moisture.
Tip: If you take a break, put on a layer so you don't cool off too much. Your body will have to work harder to warm up again.
Boots

While it may be possible to get by with traditional hiking boots, most snow trekking is greatly enhanced by winter or mountaineering boots that are waterproof and insulating. Skiing and snowboarding, of course, require their own boots that are compatible with the bindings.
Tip: Warm up socks and boot insoles by them in the sleeping bag next to you.
Key Winter Accessories
- Hats: You lose a significant percentage of your body heat through the top of your head. Follow the old mountaineering adage: "If your feet are cold, put on a hat." Consider windproof models such as those made of Gore WindStopper fabric.
- Gloves and mittens: Another must. Take extras, too, in case they get wet.
- Gaiters: A must for deep snow, they help keep snow and water out of your boots. They even add a bit of warmth. Be sure to use a waterproof/breathable model designed for winter use.
- Goggles and glasses: Always protect your eyes from sun and wind. There are different lens tints for various weather conditions.
- Socks: Wear a thin, snug layer next to your skin and a second layer over it, both made of merino wool or a synthetic fabric. The thickness of your second sock is determined by your boot fit. An extra-thick sock will not keep your feet warm if it makes your boots too tight. Take extras. If they get wet, put them in the sleeping bag next to you to dry.
The Ten Essentials
A must for any backcountry travel, the "Ten Essentials" are especially important for your comfort and safety in winter.
- Navigation
- Sun protection
- Insulation (extra clothing)
- Illumination
- First-aid supplies
- Fire
- Repair kit and tools
- Nutrition (extra food)
- Hydration (extra water)
- Emergency shelter
Winter Gear Considerations
Backpack
Winter backpacking requires extra gear, so consider a high-volume pack. Pack as lightly as you can, but always make sure you're prepared for winter conditions. Rough guidelines for a 2- to 4-day trip:
- Lightweight: minimum 65-liter (3,967 cubic inch) pack.
- Deluxe: minimum 80-liter (4,882 cubic inch) pack.
If you plan on carrying skis or snowshoes, make sure your pack has lash points or is otherwise able to secure these large items.
Sled
For longer trips and expeditions, it is common to pull a sled. A sled helps you to reduce weight on your back and lets you carry more gear. A sled is not practical for all terrain, so research your route and trail conditions beforehand. It's a good idea to practice pulling a sled while wearing your snowshoes or skis.
Sleeping Bags
Make sure you use a bag that's rated at least 10°F lower than the coldest temperature you expect to encounter. You can always vent the bag if you get too warm.
Cold- and winter-rated bags are supplied with generous amounts of goose down or synthetic insulation. Down is the most popular choice due to its superior warmth-to-weight ratio. Just make sure to keep it dry (when wet, down loses much of its insulating ability) or use the new water-resistant down bags now on the market.
Winter bags are also distinguished by their draft tubes behind the zippers, draft collars above the shoulders and hoods to help keep the heat in the bag.
Sleeping Bag Liner
Using a bag liner adds extra warmth, minimizes wear and helps keep your bag cleaner. The extra layer can add 8° to 15°F of warmth.
Sleeping Pads
These provide both cushioning and insulation. For winter camping, be sure to use 2 full-length pads to keep from losing body heat on snowy surfaces. Pads are rated by R-value, the measurement of insulation, ranging from 1.0 and 8.0. The higher the R-value, the better it insulates.
Tip: Use a closed-cell foam pad next to the ground and a self-inflating pad on top to get the best insulation from the cold ground. The foam pad also serves as insurance in case the self-inflating pad gets punctured.
Ground Cloths
A ground cloth protects your tent or bivy sack from any water that might seep from the snow through the tent floor. Any tarp will work, but a tent "footprint" (sold separately) is lightweight and is custom cut to fit your tent's dimensions.
Lighting and Batteries

Winter nights are long, so make sure your headlamp and flashlight batteries are new or fully charged before an excursion and always take extras. Lithium batteries perform well in cold weather, but they can overpower some devices like headlamps. Check your product's manual for compatibility. Alkaline batteries are inexpensive and should work in any device, but they drain at a faster rate.
Tip: Cold temperatures decrease battery life. Store your batteries and battery-operated devices inside your sleeping bag to keep them warm.
Communication Devices
You'll most likely have no cell phone coverage in the backcountry. Two-way radios allow you to stay connected to members in your group who travel at different speeds. They are, however, limited to line-of-sight coverage. Satellite messengers and phones offer an option to communicate with folks at home.
Types of Winter Backcountry Travel
You have several enjoyable options for snow travel:
- Randonee skiing (alpine touring or AT, for short): AT ski bindings let the heel move for going uphill and clamp down for downhill skiing.
- Telemark skiing: Tele skiers have their heels free all of the time, which requires a different type of turn when skiing downhill.
- Snowboarding/splitboarding: You splitboard or snowshoe uphill then descend on your board.
- Snowshoeing: This requires no special skills, and it allows you to explore heavily forested, rocky or low-snow terrain.
Tip: To keep your boots from freezing at night, put them in a stuff sack (turn the stuff sack inside out to keep the inside clean and dry) and then into your sleeping bag.
Related Gear
Poles: No matter what your means of ascent, you'll want to have a pair of adjustable ski or snowshoe poles. They provide welcome support and balance and can be used for downhill skiing or snowshoeing as well. If you don't want them for parts of your route, just shorten them and strap them on to your pack.
Ice axe: This can help you self-arrest when sliding, serve as an anchor for climbing or hack through ice when setting up camp. Be sure you know how to properly use it before heading out. Seek out competent instruction and practice.
Crampons: These provide traction when walking on snowfields, climbing on technical terrain or ascending waterfalls.
Tip: Regardless of your means of travel, have each member of your party take turns being the one to break trail in deep snow.
Route-finding in Winter

If you get lost:
- Stop and evaluate the situation.
- Stay calm.
- Check map and compass (and GPS, if available).
- Make yourself easy to find—visually and audibly.
- Stay together.
Snow and Avalanche Safety Gear
Avalanche transceiver: This is a required backcountry item for each member of your group. Most critically, be sure you know how to use one before heading out. This requires competent instruction and practice.
Probe: Another mandatory item in avalanche country, a probe is a collapsible pole with depth markings (usually up to 10' long). Sections can be quickly assembled after an avalanche to probe into the snow and help find victims.
Snow shovel: Everyone must carry one in the winter backcountry. Shovels can be used for avalanche rescue, leveling a tent site, digging a snow shelter or getting fresh snow to melt for drinking water.
 Personal locator beacon: If you are in serious danger in the backcountry, you'll be grateful to have a PLB. Once activated, it sends out a signal to satellites about your position that in turn alerts search-and-rescue teams.
 Snow saw: This can be a necessary tool when making a snow cave or igloo. Use by hand (or attach it to a ski pole for longer reaches) to cut through layers of ice or snow. It is also useful for evaluating slope stability to determine avalanche hazard.
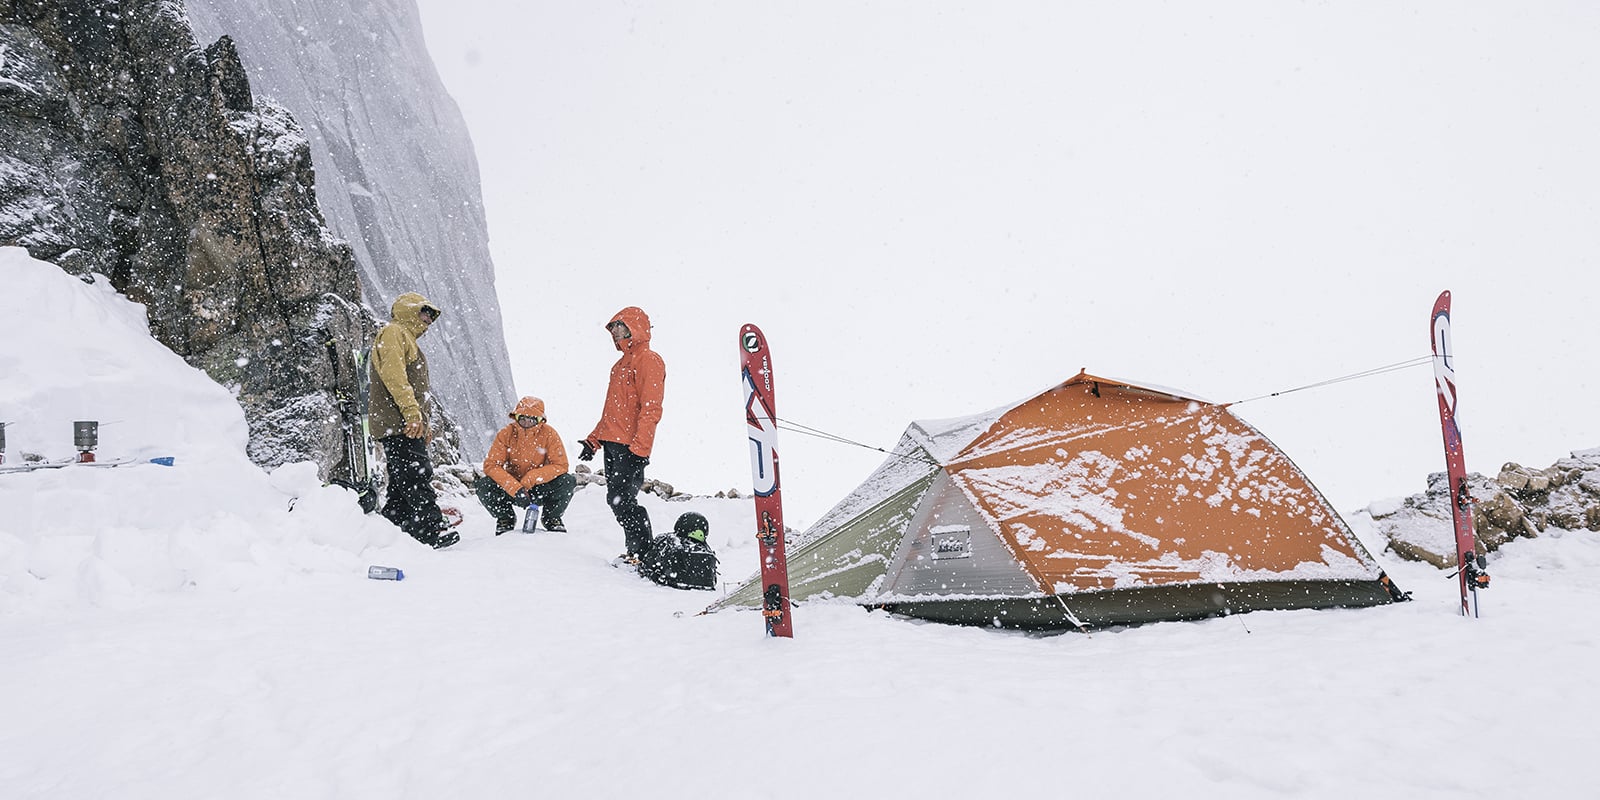
Making Camp in the Snow
Make sure you reach your destination with plenty of daylight to spare. Relax, have a snack, cool down and put on extra clothing layers. Take time to find the right camp spot and set up your gear. Considerations:
- Is there natural wind protection?
- Is there a good water source nearby—or will you need to melt snow?
- Is the site free of avalanche danger?
- Is it reasonably safe from falling trees and branches?
- Does it give privacy to and from other campers?
- Are there landmarks to help you find the camp in the dark or a snowstorm?
- Where will the sun rise? A sunny spot will help you warm up faster.
In patchy snow conditions, set up camp on the snow or an established campsite of bare ground (no plant life). Always follow Leave No Trace camping ethics.
Types of Winter Shelters
Mountaineering (4-Season) Tents
For snow camping, you ideally want a "mountaineering tent" (or "4-season tent") that's easy and quick to set up in frigid conditions. These tents are a bit heavier than 3-season backpacking tents but offer better snow/wind protection.
Typical mountaineering tent features:
- Dome shape and an extra-strong pole structure.
- Mostly solid fabric (instead of mesh) for more warmth and strength.
- Dual doors for easy access even in bad weather
- Extra guy lines for more stability in high winds
- A "gear attic" to stow small items and free up floor space
- Large vestibule(s) for wet-gear storage or a sheltered cooking area.
Mountaineering tents employ either single-wall or double-wall construction. Each has its advantages.
| Single-wall | Double-wall |
| Lighter weight | Heavier and bulkier |
| Cooler than a double-wall | Warmer than a single-wall |
| Quick setup | Longer setup time |
| Costs more than a double-wall | Costs less than a single-wall |
| Potentially more condensation | Better ventilation, less condensation |
Setup tips:
- If it's windy, build a snow wall if possible. If it's not feasible to do so, then dig out the snow a couple of feet down for your tent and vestibule. This helps to reduce wind impact.
- Pack down the snow before setting up your tent. Loose snow is more likely to be melted by your body heat and make it uncomfortable for sleeping.
Bivy Sack
Ultralight backpackers can opt to skip the tent and go with a bivy (short for bivouac) sack instead. A bivy is simply a waterproof/breathable overbag for your sleeping bag. It keeps you and your sleeping bag dry and adds about 10ºF of warmth to a bag. A few models known as bivy shelters have mesh netting and poles that give tent-like protection around the head area.
Tip: There is no room to stow your gear in a bivy sack, so remember to bring a cover for your gear.
Snow Caves, Igloos, Quinzhees and Trenches
To build one of these shelters, you need a snow shovel and, for igloos, a snow saw. Before digging, use a probe to make sure you won't be digging into a rock. And, just in case, bring a tent as a backup shelter.

Steps to building a snow cave:
- First, you need lots of snow in a site that is level and has no risk of avalanches. You may need to use a snow bank or a drift.
- If practical, make the cave large enough to accommodate everyone in your group. Make the base of the cave or igloo about 2 to 3 feet thick.
- Dig the tunnel sloping it upward so that colder air stays lower.
- Hollow out the snow cave dome. Make it large enough so you can sit up.
- Smooth the roof so you don't get drips on your sleeping bags.
- If desired, make snow benches to sleep on. Colder air remains below the bench so you stay warmer.
- Important: Make a ventilation hole in the roof to avoid risk of suffocation. This should be about the size of your ski or trekking pole basket.
- Use a waterproof tarp for the floor.
- Snow is heavy and needs to be supported correctly. Avoid making the cave too wide and know what to do if the roof collapses.
Tip: Put a backpack in the doorway to keep a snow cave warmer. Just make sure the door remains accessible.


Steps to building an igloo:
- Find or make a level space in the snow.
- Dig a gentle slope to make an entrance passage. This helps to keep the warmer air in and the colder air out.
- Using your shovel and snow saw, make snow blocks from hard blocks of snow.
- Form a row of blocks in a circle. The first tier of snow blocks should be thicker than the others.
- Make a second layer on top of the first, decreasing the thickness and staggering the block joints.
- Keep stacking blocks, gradually decreasing the thickness so that the upper tiers are thinner and tapered toward the center to form a dome.
- Make a hole in the top for ventilation by leaving a gap between 2 blocks or making a hole through one of the blocks.
- Fill in any other cracks or gaps with snow.
- Smooth the blocks on the inside to minimize dripping water.
Tip: Don't make it too big. The wider the base, the greater the risk of collapse. Sprinkle water over the igloo at night (early in the day is OK if the temperature is cold enough) to freeze and strengthen the structure.
Steps to building a quinzhee:
Sometimes, the snow may not be deep enough for a snow cave nor firm enough for an igloo. In these cases, a quinzhee makes an excellent alternative.
- Stomp a circle in the snow to create a foundation (size depends on the number of occupants).
- Pile snow inside the circle in a large dome until it's about 6 feet high at center.
- Let the snow settle at least 2 hours, longer if the snow has less moisture content.
- Proceed as if building a snow cave.
Steps to building a snow trench:
 A snow trench is a relatively quick and easy shelter for 1 or 2 people. It is typically an emergency shelter and will not be as comfortable or warm as the snow shelter described above. It is not recommended during heavy snowfall since the "roof" could easily collapse with the weight of additional snow.
- Dig a trench at least 3 feet deep, 3 to 4 feet wide (for 1 person) and about 6 feet long. Make an entrance at one end.
- Place skis, poles and/or tree branches across the width of the trench.
- Stretch a tarp or emergency blanket over the trench, and anchor the sides and foot end with snow and/or additional tree limbs.
Tip: Wear your wet clothes while establishing camp. Your body heat will help them to dry more quickly than it would to hang them.
The Winter Kitchen
Backpacking Stove
Liquid-fuel stoves (rather than canisters) are recommended for cold temperatures. White gas is readily available in North America, Australia and New Zealand. For other countries, consider a multifuel stove that allows you to burn auto gas as well. Before you leave home, make sure your camp stove is working properly.
Other considerations: You may want a windscreen and heat exchanger to improve winter cooking performance. Keep in mind, too, that you'll use more fuel at higher elevations, and it takes extra fuel to melt water. Finally, bring a backup stove, just in case. The added benefit is that having 2 stoves speeds up the group-cooking process.
Camp Cooking Area
It's best to have a sheltered cooking spot, which can be as simple as your tent's vestibule. If you have the time and energy, dig a trench about 3 feet deep to create a cooking area that is sheltered from the wind. One of the joys of winter camping is the ability to build a kitchen, using your shovel to make a cooking surface, seats, table and even a storage cabinet. Use your imagination to make it as elaborate as you'd like. Consider taking a foam sit-pad to use while cooking on the cold surface. It helps you stay a little warmer and drier.
Food Tips
If you're snowshoeing, skiing or boarding, you are using a lot of energy. Be sure to eat before, during and after your activity to keep your energy up and help your body recover.
Proteins, fats and carbohydrates all provide energy.
- Proteins (meats, dairy and eggs) help build muscles and body tissue.
- Fats (nuts and meats) are used primarily for energy.
- Carbohydrates (cereals, legumes, vegetables, fruits, breads and candy) also provide energy.
During your activity, consume some of the many energy foods, performance beverages and snacks available. Consider food that does not take much cook time or clean up. Look for one-pot meals or, better yet, buy some freeze-dried entrees and breakfast foods—just add hot water in the pouch and pack the garbage out. No dirty dishes!
Avoid alcohol and caffeine. Alcohol increases blood flow and cools your core temperature; caffeine restricts blood flow and cools your extremities.
Tip: To stay warmer, don't stop for long lunches where you cool down and then need to put on more layers. Instead, take short breaks to snack on food, or simply nibble while you're moving.
Cold-weather Health Concerns
Hypothermia
This is the body's temperature decreasing due to exposure to the cold conditions. It can be life threatening. A person can become hypothermic without even noticing it.
Symptoms:
- Shivering.
- Slurred speech.
- Non-communication.
- Lethargy.
Prevention:
- Stay warm.
- Stay dry.
- Stay hydrated.
- Eat well.
Remedies:
- Put on dry clothing.
- Eat and drink warm foods and fluids.
- Put the person in a sleeping bag pre-warmed by another person—a hypothermic person doesn't have enough heat to warm the bag.
- Put warm water in bottles and place them in the sleeping bag with the person.
- Use another person to warm the hypothermic person.
- In severe cases, careful evacuation to a medical facility is required.
Tip: Carry a small vacuum bottle with a hot drink or soup—it'll warm you up when you're getting cold.
Frostbite
This happens in cold-weather conditions. Frostbite is a freezing of the tissues usually on the fingers, toes, nose or face. It is a result of heat being lost faster than the blood can circulate. In severe cases, appendages may have to be amputated.
Tip: Use chemical heat packs to help stay warm and to avoid getting frostbite.
Symptoms:
- Numbness to an area.
- Loss of sensitivity to touch.
- Tingling that feels like burning.
- Shivering.
- Skin appears red and then white-to-purple.
Prevention:
- Don't put yourself in that position. You don't have to reach a summit, your health and well-being are more important.
- Be aware of your body signals.
- Stay warm and dry.
Remedies:
- Place the cold/frostbitten appendages against warm skin, such as your feet against a companion's stomach or armpits, or your fingers in your own armpits.
- Use warm water—99ºF to 104ºF—on the afflicted area.
- Do not use fire to thaw area—speedy relief can increase the injury.
- Do not rub because the abrasive action could damage tissue more.
- Evacuate to a medical facility.
Dehydration
Even when the temperature is low, you can still get dehydrated and that's not good for your kidneys, heart or brain. So drink plenty of water—even if you're not thirsty. Drink before you become thirsty.
Tip: Keep the fluids flowing in freezing weather with an insulated reservoir and tubing. In extreme cold, leave the reservoir at home and use a water bottle cover for your bottle. Turn the bottle upside down. (Water freezes from the top down, so by turning it right-side up you'll be able to unscrew the cap and drink.)
A good way to determine if you're drinking enough is to check the color of your urine. If it's dark, you are dehydrated. If it's pale in color, you're doing a good job hydrating!
Other symptoms of dehydration in extreme temperatures:
- Increased heart rate.
- Dry mouth.
- Dizziness.
- Muscle cramps.
- Confusion.
- Weakness.
For treating water:
- Water filters do not work in sub-freezing weather—the filter and seals freeze.
- Chemical water treatments take longer to work in cold water, so allow extra time. Keep in mind that iodine is not effective against cryptosporidium and should not be used.
- Melting snow is a good option. Putting a little bit of water in the pot with the snow will help it melt faster.
- Portable UV light systems offer another effective option.
Altitude Sickness
Altitude sickness is a result of being in a low air pressure at a high altitude. Symptoms include nausea, severe headache, dizziness, insomnia, shortness of breath, lethargy, body ache and not wanting to eat. The remedy: Descend to a lower elevation for a few days.
Tip: Make a camp base and acclimatize for a few days before climbing higher. One strategy—don't ascend more than 1,000' a day.
Sanitation in the Snow
As with any backcountry trip, you should always practice good hygiene habits.
- Camp at least 200' from a trail, water sources and other campers.
- Pack out toilet paper. A plastic zipper-style bag works great for this.
- At lower elevations, you can dig a hole in the dirt about 8" deep, bury feces and put a rock on top to deter animals from digging it up.
Snow camping requires extra steps to be taken with your body wastes. You should always bag your waste using sanitary kits. These often include bag neutralizer (to reduce odors and turn the waste into a gel for easier transport) and a hand sanitizer.


Comments